Congratulations, you’ve planned, designed and developed your course! Next, you need to focus on your online course delivery and your learners experience.
Table of Contents
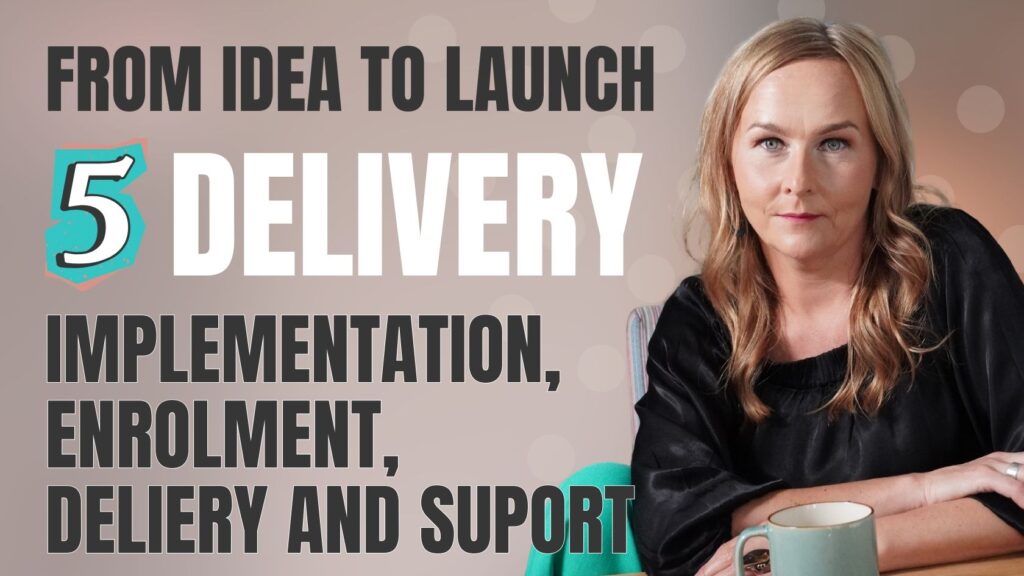
From Idea to Launch
The 6-stage model to guide you through the eLearning development process:
- Stage 1: Plan Your Course and Project – Audience, Topic, Strategy
- Stage 2: Design Your Course – Structure, Content Types and Content Writing
- Stage 3: Create Course Content – Use Tools and Technology to Develop Your Course
- Stage 4: Promote Your Course – Online Course Marketing, Launch and Sales
- Stage 5: Deliver Your Course – Implementation, Enrolment and Support
- Stage 6: Support and Evaluate – Post-Launch Evaluation and Continuous Improvement

Overview of Stages 1, 2, 3 and 4 (Planning, Design, Development and Marketing)
Before diving into Stage 5, let’s look at what happened in the previous stages. Select the headings below to view details in a dropdown.
Stage 1:
Planning your course and business strategy:
You identified your target audience, validated your course topic, and created a project plan.
Stage 2
Design your course:
You refined your course structure and designed engaging content through storyboards, scripts, and initial content writing.
Stage 3
Development – creating your course content:
You refined your course structure and designed engaging content through storyboards, scripts, and initial content writing.
Stage 4
Promoting your course content:
You organise your efforts on marketing and outreach to build your prospect audience.
Having completed stage 1 and 2 steps, you should have the following deliverables in place:
Strategic Foundation:
- Validated course idea and niche: A clear understanding of your topic, target audience, and niche.
- Detailed learner persona: A profile of your ideal learner, including their needs, goals, and pain points.
- Course roadmap and project timeline: A structured outline of your course’s sections and lessons.
- Technology requirements and platform decisions: Choices regarding the tools you’ll use for content creation.
- Final marketing strategy: A plan for promoting your course and planned your launch and marketing campaign.
Course Design Elements:
- Comprehensive course structure: A roadmap outlining the course sections, lessons, and topics.
- Defined learning outcomes: Well-defined goals, objectives, and measurable outcomes aligned with your learners’ needs.
- Content strategy and media choices: Decisions about media types (videos, text, interactive activities) and delivery methods (self-paced, live workshops, webinars).
- Content, scripts, and storyboards: Content for modules, lessons, storyboards, and scripts or drafts for videos, lessons, or interactive elements to guide content development.
- Quality standards and guidelines: Clear criteria to maintain high-quality content.
- Course content: complete developed course content on platform of your choice
In this post, I will focus on stage five – delivering your course and creating a great learning experience.
Stage 5: Online Course Delivery: Implementation, Enrolment and Support
1 What “delivery” really means
When I talk about course delivery, I mean three things coming together: assembling the course in a learning platform, making it accessible to the right people, and supporting learners while they work through it. It is the operational side of your promise – the part that makes sure learners can actually experience what you described in your sales page and learning outcomes from Stages 2 and 4.
Decisions you make here should still be guided by your learner persona, learning outcomes, and course format from earlier stages. A self‑paced video course for busy professionals will need different delivery choices than a cohort‑based, tutor‑supported programme with live workshops, for example. I also see some recurring challenges at this stage: tech overwhelm, using too many disconnected tools, and underestimating how much time support and admin will take once real learners join.
2 Assembling and hosting your course
Choose (or confirm) your platform setup
In Stages 2 and 3, you will already have thought about how your course will be structured and which tools you plan to use for content creation and hosting. Now you confirm where the course will actually live: a full LMS (like Moodle, Canvas, LearnUpon, Cypher, Thrive, RiseUp), a course platform (like Teachable, Thinkific, Kajabi, LearnWorlds), your own website with plugins, or a simpler hosted solution.
Many modern platforms blur the line between authoring and delivery: some include built‑in AI authoring, video editing, quizzes, and community features in the same place where learners access the course. That can speed things up, but the same checks still apply – you still need clear structure from Stage 2, quality content from Stage 3, and a delivery plan that matches your launch model from Stage 4 and my separate post on online course launch models.
Build the course space
Once you know where your course will sit, you move from having “assets” to building a coherent learning experience in your chosen platform. This usually involves:
- Creating the course shell, then setting up sections and lessons that mirror the structure you designed in Stage 2.
- Uploading learning assets – videos, slides, PDFs, SCORM/xAPI packages, interactive content – and using consistent naming, descriptions, and navigation so learners never feel lost.
- Configuring activities and assessments (quizzes, assignments, discussions, reflections) so they map back to the learning outcomes you wrote earlier.
Some platforms now include native AI content generation and authoring, which can help you create structures, generate quiz items, summaries, or additional examples directly inside your LMS or course builder. If you choose a platform with this built in, you can streamline two stages at once: for instance – creating course structure and authoring, or authoring and LMS setup, which is particularly helpful if you do not want to juggle multiple tools. Check out my posts on Integrating AI into your processes where I talk about more about the platforms capabilities:
How to Choose the Right AI-Powered Course Creation Workflow for Your Team Not all AI-powered platforms work the same way. This post compares traditional LMS processes with AI-powered course creation workflow, helping you choose the approach that genuinely serves your learners and timeline.
AI in Learning Design and Development. My 6 Stage Process. A practical, six-phase framework for AI in learning design that blends AI generation and human validation. Discover how AI is transforming my workflows. Elevate instructional design with innovative, research-backed strategies for superior learning outcomes.
From my own projects, a few practical tips make this smoother:
- I always start from a checklist that mirrors my course roadmap: each module has a list of required items (video, transcript, quiz, resources, workbook page) so nothing gets forgotten.
- When I work on a multi‑module course, I set up a “golden” lesson, the ‘blueprint’ or module as a template (layout, fonts, colours, block types) and then clone it for the rest, which keeps the look and feel consistent and saves time.
- I batch upload media (all videos, then all PDFs, etc.) and only then worry about arranging them – this reduces context‑switching and speeds up the build.
- I keep consistent and meaningful naming conventions and I am very disciplined about versions control and archiving outdated items.
If you plan to use AI tools for content production – like the ones I describe in my posts on AI video tools or getting started with AI video creation – check if they seamlessly integrate with your platform before committing to them.
Set up course settings and logistics
Beyond “what learners see”, there is a layer of settings and logistics that can make or break the delivery experience. At a minimum, I recommend checking:
- Access dates and pacing: Is this self‑paced, or will learners move together as a cohort with fixed start and end dates? Are modules dripped over time?
- Prerequisites and progression rules: Do learners need to complete certain lessons or pass quizzes before unlocking the next section?
- Completion rules and certificates: What counts as “finished” – watching videos, passing assessments, submitting assignments – and will they receive a certificate or badge?
- Notifications and reminders: When do they get reminder emails or in‑app notifications (e.g. new module available, upcoming live session, inactivity nudges)?
This is also the moment to connect your delivery with your chosen launch and delivery model which I explain in more detail in my post on online course launch models. The way you open and close access, handle enrolments, and send communications should all match that choice.
Finally, do not skip compliance basics. Make sure you:
- Use privacy‑friendly settings when handling learner data, and clearly state what data you collect and why.
- Consider accessibility: captions or transcripts for videos, good contrast, meaningful link text, and screen‑reader‑friendly layouts. (See my posts about: 18 Aspects of Accessibility in Online Courses: Create Inclusive eLearning and Choosing Accessible Colours in eLearning Design: Contrast, Combinations & Legal Compliance
- Check where your platform stores data and how that aligns with regulations relevant to you and your learners (for example, GDPR for EU learners).
3 Testing and quality assurance
Why testing matters at this stage
No matter how carefully you build the course space, there will be glitches if you skip testing. Common problems I see include broken links, videos that will not play on mobile, confusing instructions, or enrolment issues that stop people logging in on day one. These issues quickly turn into extra support requests and frustration for both you and your learners.
Quality assurance is not just about “fixing bugs”; it protects the learner experience and the brand you have been building since Stage 1 and especially Stage 4 when you made specific promises in your marketing. A course that works smoothly, from sign‑up to completion, builds trust and makes it much easier to ask for testimonials, referrals, and repeat business later.
What to test before launch
I like to think of QA in three layers – here are some examples:
- Technical checks:
- Do all videos, audio files, and downloads load properly on different devices?
- Are all links (internal and external) working?
- Do SCORM/xAPI packages launch and track correctly?
- Do quizzes behave as expected, and do scores and completion get recorded?
- Does the course look usable on mobile, tablets, and desktops?
- Functional checks:
- Can a learner go from “I want this course” to “I am in the first lesson” without hitting a roadblock?
- Does the enrolment flow (sign‑up, payment or registration, confirmation email, first login) work as intended?
- Are confirmation and welcome messages actually sending and landing in inboxes?
- Learning experience checks:
- Are instructions clear and visible at the right time, or do people need to “guess” their next step?
- Does the estimated time for each lesson match reality (or is it far too long or short)?
- Do content, activities, and assessments still align with the learning outcomes you defined earlier?
How to structure your QA process
You do not need a huge team to run QA; even a solo course creator can put a simple process in place. Here is what I usually recommend:
- Do a solo test of the entire journey using multiple devices and at least two different browsers, pretending you are a brand‑new learner.
- If possible, invite 1–3 “beta” learners or trusted colleagues for a soft launch and watch where they get stuck or confused; short interviews or feedback forms here are very valuable.
- Track all findings in a basic spreadsheet or project board with columns like “Issue”, “Where it appears”, “Priority”, and “Fixed?”, then review it before officially opening enrolment.
4 Setting up enrolment and access
Decide how learners will enrol
There are a few main enrolment patterns you can choose from. Your decision will depend on your business model, target audience, and the launch approach you chose in Stage 4 and in the launch models article.
The most common methods are:
- E‑commerce inside or your LMS or platform or weebsite – learners buy and get auto‑enrolled. This works well for evergreen and scalable paid courses where you want minimal manual admin.
- Self‑registration / self‑enrolment – learners create an account and add themselves to a course, sometimes using an enrolment key or code. This is often used in open or semi‑open training programmes and for free resources.
- Manual enrolment by an admin – you or your client add learners to courses, which is common in corporate or small‑cohort programmes where control, contracts, or reporting matter more than automation.
- External payment plus manual enrolment – for example, people pay via Stripe or PayPal on a sales page and you then enrol them manually in the LMS.
Here is a quick comparison:
| Enrolment method | Best for | Pros | Cons |
|---|---|---|---|
| E‑commerce | Public/evergreen paid courses | Automated, scalable, integrated payments | Needs more initial setup and payment config |
| Self‑registration | Open programmes, free resources | Fast for learners, less admin for you | Needs monitoring and good data/privacy flow |
| Manual enrolment | Corporate/cohort groups | High control, good for small numbers | Time‑consuming and harder to scale |
Try to keep your enrolment model as simple as possible at the beginning; you can always automate more later once you know your process works.
Map and document the learner journey
I like to sketch the entire learner journey on paper or in a simple diagram so I can see every step from discovery to the first activity. For most courses, it looks something like this:
- Learner sees your course offer (via your marketing from Stage 4 – social post, email, webinar, or sales page).
- They visit the sales or information page and decide to join.
- They sign up or purchase (depending on whether it is free or paid).
- They receive a confirmation message (on screen and by email).
- They create or access their account and log in to the platform.
- They land on a clear course dashboard or welcome page.
- They start the first recommended activity.
Writing this out, step by step, helps you spot missing emails, confusing redirects, or friction points – especially if you compare this map to what you promised in your marketing. Then you test it yourself as a fake learner and adjust where needed.
Configure communications and onboarding
Good onboarding is one of the most effective ways to reduce support requests and help less tech‑confident learners feel comfortable. At a minimum, I recommend setting up:
- An order or registration confirmation email that clearly explains what happens next and where to click.
- A welcome email that introduces you, sets expectations, and links to a short “How to use this platform” guide or video.
- A reminder email just before the start date (for cohorts) or a nudge a few days after enrolment (for evergreen courses) encouraging learners to start.
- Early progress nudges for learners who have signed up but not yet started or who have stalled part‑way through.
You can build these using your LMS/email automation or an external email tool, but keep them consistent with your tone of voice from earlier stages and your overall brand.
5 Planning learner support, customer service and monitoring
Stage 5 is also where you start feeding into Stage 6: You are preparing to support your learners – proper support means better experience.
Define your support model
Support is not just “answering emails when something breaks”; it is part of your learning design and a big factor in how people experience your course. Different courses will need different support models, but some common options include:
- A dedicated support email inbox for technical and access issues.
- A ticketing system (even a simple one) if you have many learners or multiple courses.
- Direct messaging or Q&A inside your platform.
- Regular live Q&A calls or office hours, especially for cohort‑based or higher‑ticket programmes.
- A community space or forum, either inside the platform or in a separate tool.
When I design support, I go back to my learner persona from Stage 1 and the course format decisions from Stage 2 and my post on instructional strategies for different formats. Busy professionals might prefer asynchronous support (email, platform comments, FAQs) over fixed‑time live sessions, for example.
Set expectations and boundaries
Transparent expectations are one of the easiest ways to keep both you and your learners happy. I suggest making the following points very clear:
- When you respond: your typical response times (e.g. “within 24–48 hours on business days”) and support hours/time zone.
- What you support: whether you help with content questions, tech issues, or both – and what is outside the scope (for example, custom consulting or personal coaching).
- Where to ask: which channel to use for what (e.g. email for technical access issues, discussion forum for course questions).
Include this information in your welcome module, your onboarding emails, and ideally your sales page so learners see it before they buy. This reduces confusion and prevents unrealistic expectations around “instant” support.
Create self‑service resources
Self‑service resources are a huge time‑saver once you have more than a handful of learners. A simple help area might include:
- A short “How to use this platform” video walking through login, navigation, where to find resources, and how to mark lessons complete.
- FAQs covering common questions: “I cannot log in”, “I forgot my password”, “The video does not play”, “Where is my certificate?”.
- Basic troubleshooting tips (try another browser, check your internet connection, clear cache) tailored to your platform.
These resources let learners solve many issues themselves, which is especially important if your audience is spread across time zones and you cannot be online all the time.
Factor support into your capacity and pricing
Support takes time – sometimes more time than content creation – and it needs to be planned rather than treated as an afterthought. When I scope a new course, I look at:
- Cohort size and intensity: How many learners are realistic for me to support well at once, given my other commitments?
- Support channels: How much time will I spend per week on email, comments, community moderation, or live calls?
- Admin: How long will enrolment adjustments, certificates, and reporting take for each run?
Once you have those estimates, reflect them in your pricing, your schedule, and possibly your choice of launch model – some models, like high‑touch cohorts, need higher prices and lower volume to stay sustainable. Treating support as part of the offer (rather than invisible labour) also helps you describe its value more clearly in your marketing
Gathering feedback and reviews
Instead of waiting until “the end”, you can decide and set up monitoring and collect different types of feedback while you deliver your course. What kind of feedback to collect?
- Learner experience feedback: How did they find the navigation, pacing, clarity of instructions, and support? Did they feel lost or guided?
- Learning impact feedback: Did they feel more confident? Are they applying what they learned? Has anything changed in their work or behaviour?
- Technical feedback: Any recurring issues with devices, browsers, video playback, or the LMS itself.
You can gather this through system monitoring and analytics capacities, structured tools like surveys, polls, and rating scales, as well as informal channels like email replies, comments, and quick interviews.
The Summary
Stage 5 is where your course stops being a plan and becomes a real experience for real people, which can feel both exciting and a bit scary. Delivery is a continuous and usually iterative process – the first run will always reveal issues and improvement ideas, and that is part of building a stronger course over time.
My suggestion is to choose one course (or even one module) and commit to fully implementing it: assemble it in your platform, run through a simple QA process, set up a clear enrolment path, define your support model, and decide how you will collect feedback. Then ask yourself: which part of delivery do you feel least ready for right now – the tech setup, enrolment, or ongoing support – and what is one small step you can take this week to move that forward?
Note, that this post provides general information about Online Course Delivery.
It is important always to consider the specific context and requirements of your learning projects. If you have any questions or would like to delve deeper into the topic, please email me or book a free online consultation via my contact page.
If you like productivity hacks, check out my recent posts. You will find there tips and recommendations for tools, practices, and approaches that may help you work less and smarter:


